6 sounded like a good year to have a carnival/circus themed party! This was probably one of the easier ones to put together because items were easy to find, costumes I found early, and a dear friend had sent me … Continue reading
6 sounded like a good year to have a carnival/circus themed party! This was probably one of the easier ones to put together because items were easy to find, costumes I found early, and a dear friend had sent me … Continue reading
So I found out 2 weeks before Halloween that I was going to be Room Mom. No one had volunteered for it… and you know…. Yeah…. YOU KNOW.
My daughter’s teacher liked his holiday events more like activity stations that the kids can rotate through. I thought it was a great idea too, because then the kids have lots to do, and its not all about eating sweets. So with 2 weeks to pull it together, I combed Pinterest for about 6 activities related to Halloween that would be engaging and cover an array of areas (art, fine motor, science, etc). Here’s what I ended up with:
Food Activity: Spiders and Monster Mouths
I choose these in an effort to avoid cookie decorating. I figured the oreo and the marshmellows would be offset by pretzels and apples.


Spider Web Lacing: For some fine motor skills!
Original Pinterest link here.


Science: Fizzy Eyeballs
I wasn’t able to find plastic eyeballs as the original I found on Pinterest. But I did already have these glow in the dark bouncy balls that I had from a previous projects. They were perfect because the kids were excited to be able to keep their ball afterwards. We did them in individual plastic cups to contain the mess. And the kids were able to select from various colored “potions” to drop on their eyeballs. See original Pinterest link here.


We also did a fine motor activity adapted from this Pin I found. We used chopsticks instead and had the kids pick the spiders up with them and sort them into cups.
Lastly, we did some scissor skills by having them make pumpkins from this Pin here.

I first saw a pin for a cardboard robot here. I thought it would be an inexpensive way to add some fun decor to our robot party. First things first… Start collecting boxes! Once I got most of the shapes I needed, I started to spray paint it….. unfortunately, that robot had a really big body!


To be honest I ran out of spray paint after just doing the body and head… so we opted to just foil the arms and feet for contrast. Was then going to do the legs in red or something (because that’s a leftover color I had) but we lucked out when my mom went to Costco and saw these star patterned boxes in exactly the shape we needed. Score!!! For the shoulders and hands, we bought the tubing at Home Depot for a few bucks.

We pretty much tried to use whatever we could find around the house to finalize the robot. The ears are spray painted pieces of a to-go cup holder from some fast food restaurant. The eyes are cupcake wrappers. Colored popsicle sticks for the mouth. Pipe cleaners for the antenna!

We then recycled the number 3 cutout I had made for the photo prop from my son’s birthday photos. It was perfect on the body! Then we found some little stampers to use as buttons.
Total cost: about $15

I first saw this on Pinterest here and totally thought it would be the perfect way to backdrop the photobooth this year.
I bought a little bit more than I needed to start. … but ultimately used 3 table covers and two banners from Walmart. Didn’t cost more than a total of $7

The longest part was probably the cutting. The strips were about 3 inches wide and the braids were maybe 3 inches down. I’m pretty good at braiding so that was easy, although my arms were sore from being in the upward position for so long. Haha.


I have to admit. It looked pretty cool once it was all braided and the colors mixed together.

Add the banners… and there you have it. I contemplated doing the fans at first…. but I didn’t want to take from the photobooth template. So I kept the backdrop simple.

Looks good! I’m definitely going to do this again! Different colors!
For my daughter’s “Disney” themed birthday party, I had to conjure up some costumes for my mom and aunt. I was trying to think of cool BFF costumes… and decided it would be fun for them to go as Tweedle-Dee and Tweedle-Dum (I ended up dressing up as Alice anyways, so it worked out!)

I headed to Michael’s and purchased the following:
2 Yellow Gilden T-shirts
1 blue 8×10 felt
1 white 8×10 felt
1 sheet of Yellow foam
Then I headed to Walmart and picked up some white fleece material about a yard and a half – got extra because I was making a Woody Vest for my dad as well (more on that at bottom!)

So for the lowdown on the homemade costumes…


The hats: I used fabric “puffy paint” to write in the character’s names after I cut out small rectangle pieces. While that was drying, I sewed a straw to the top of each hat. I opted to sew it because I couldn’t imagine any type of adhesive or glue being able to keep a stick straight on top of the hat. It actually held it up pretty good and was easy to fix if it got moved at all. After I sewed on the straw, then I hot glue gun the yellow “flag” piece at the top and the names on the front.


The shirts: I visually saw what shape I was going for for the collars of the outfits… so I actually kind of free-handed the cutting. Lucky for me they turned out pretty good. But you can see the shape and where the cuts were made. Once it was cut, we sewed the back part of the collar and the top shoulders, and the center to the shirt. Just those key spots – not the whole perimeter of the collar. For the bow, I folded it into a pleat and sewed the center. then let it fan out before we sewed it to the shirt.


So for the Woody vest. I basically folded my fleece in half and cut out a neck hole first. Then plopped it over my dad and drew out the lines for where I wanted to cut off the shoulders and down the sides. Then free-handed where the cut down the front would be. For the cow spots, I cut out random shaped oblongs onto card stock and spray painted them onto the fleece. Once that was done, we sewed up the sides of the vest, added a red bandana ($1.50 at Walmart) and a cowboy hat and we were good to go. Simple but still in the spirit of the party.

Found this on Pinterest and started doing this with my daughter at age 3. The answers are pretty funny and interesting to see as they change throughout the years. Looking forward to starting my son’s interviews this year!
Here’s my pin and the original blog (this momma made a birthday album/book out of it).
and here’s the list of questions (customize your own of if you wish of course!)
1. What is your favorite color?
2. What is your favorite toy?
3. What is your favorite fruit?
4. What is your favorite tv show?
5. What is your favorite thing to eat for lunch?
6. What is your favorite outfit?
7. What is your favorite game?
8. What is your favorite snack?
9. What is your favorite animal?
10. What is your favorite song?
11. What is your favorite book?
12. Who is your best friend?
13. What is your favorite cereal?
14. What is your favorite thing to do outside?
15. What is your favorite drink?
16. What is your favorite holiday?
17. What do you like to take to bed with you at night?
18. What is your favorite thing to eat for breakfast?
19. What do you want for dinner on your birthday?
20. What do you want to be when you grow up?

For this year’s Disney themed birthday party, I saw some really cool Minnie/Mickey Mouse Centerpieces on Pinterest that I could definitely recreate. Armed with my Michaels coupons, I loaded up on all the supplies and it turned out great! Not hard to compile at all. Here’s how it went:

I used 5″ Styrofoam balls for the head and 3″ for the ears. Stuck them on some skewers before I inhaled a ton of spray paint 🙂


For the Styrofoam holding the bottom I just loaded up on what they had at Dollar Tree. I also lucked out and picked up the yellow pails on sale at 40% from Michaels so they came out to $3.12 a piece.

These number 5 ‘ s were from Michaels and basically unfinished chipboard pieces at $.79 a piece. I used some regular acrylic paint on the first coat followed by a glitter red coat.

Assembled the heads… I used a thicker dowel to hold up the head for the actual centerpiece. Had spray painted it black when I did the balls.

Got ribbon on sale. Made sure to get the wired kind so that it would be easier to shape into a nice bow. Glued them to toothpicks.

The yellow stars were also chipboard pieces from Michaels. They were already yellow so that was a bonus. Glued the stars and the 5 ‘ s to skewers. Then bought a red paint pen to write my daughter’s name on the star. This totally could have been done with a thick sharpie or glitter glue.

For the final touches…. I got some tissue paper to hide the Styrofoam bottom. I actually put sand on the bottom as well to give it some weight.

There you have it!!!
P.s. I’m saving all these pieces (minus the star and bow) so I can reuse them in 2 years when my son has his 5th birthday party Disney themed.

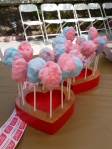
Thank you Pinterest for showing us that everything sweet is good on a stick! So…. I guess we could also call these “Peep Pops”? Hahhaa. Call it what you want… but they are simple to put together and that’s what I was looking for this week for my daughter’s Easter Party class treats.


I got the peeps at a good time too. Rite Aid sold them at buy 1, get 1. So I only paid $1.99 for the two dozen packs. Perfect since I needed 24 anyways. Combined that with some supplies from Michaels and basic address labels that I printed off my computer.

Then I sat down to watch a show on my DVR while I put everything together. Not bad!

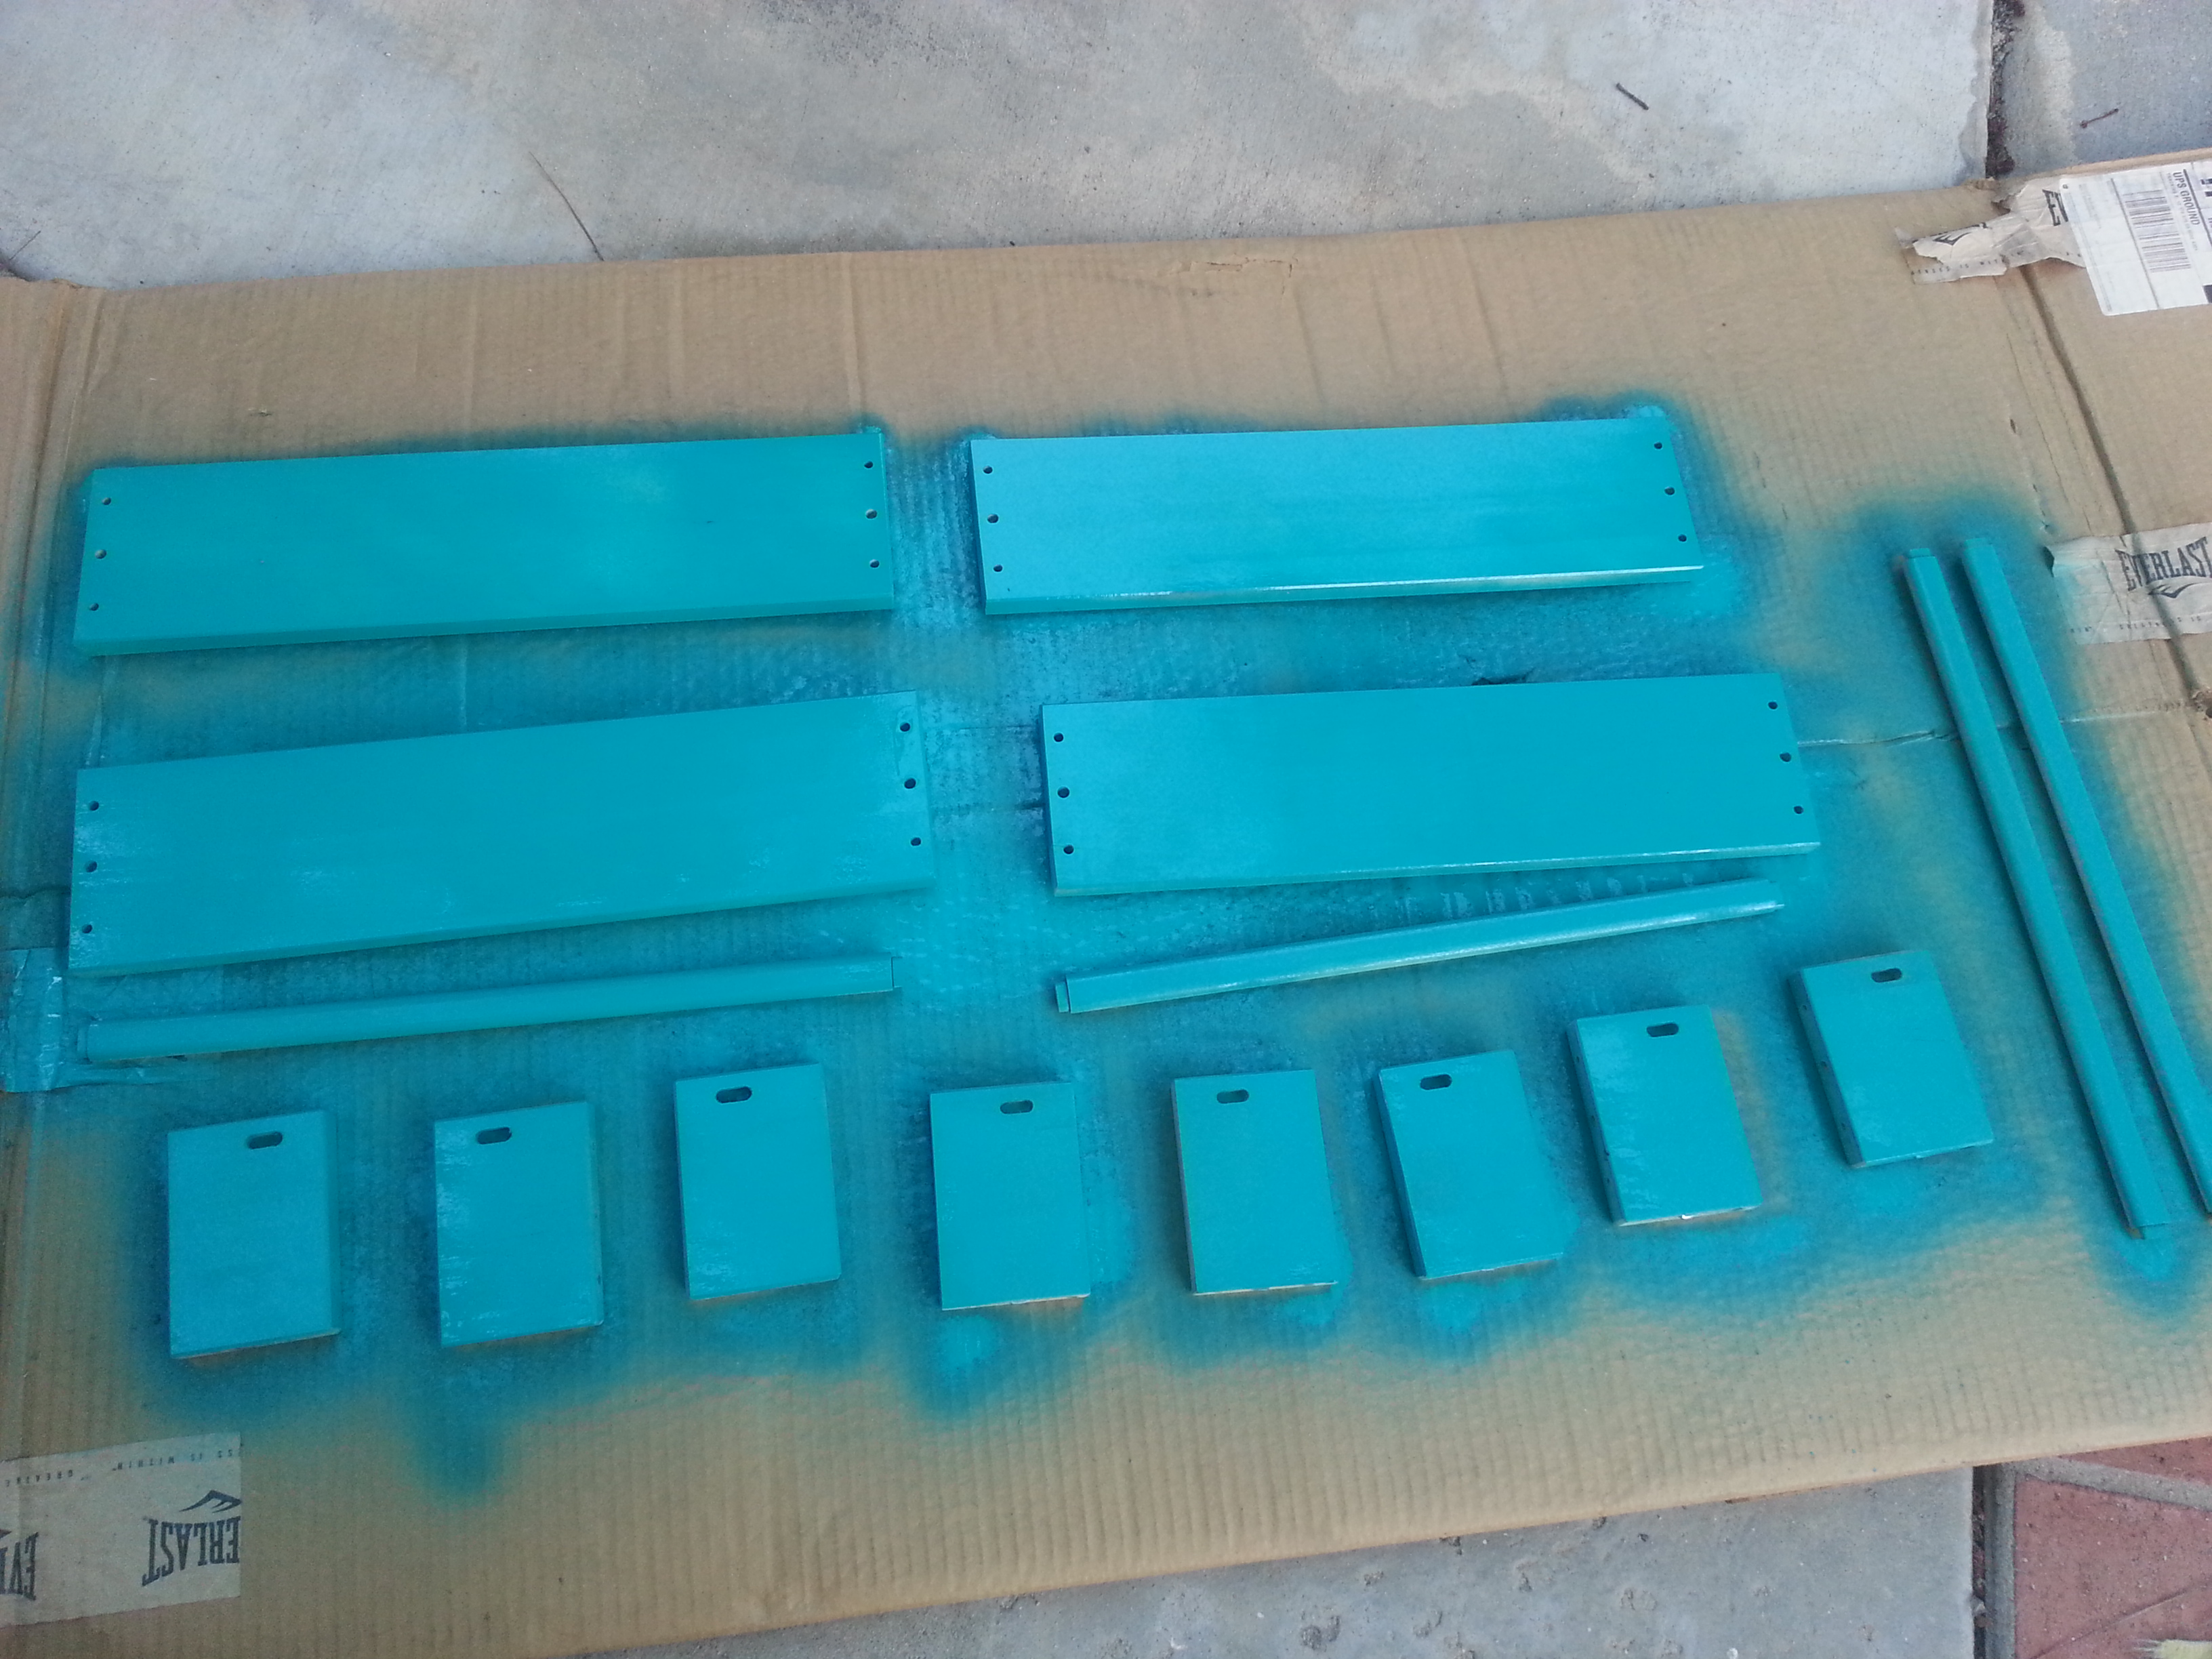
This all started with Pinterest. Of course. And if you simply search “ikea spice rack” you will see tons of pins for it. Simple enough.
I actually found my spice racks on Amazon for about $10 each. Remember that they don’t come with the hardware!
This was probably one of the simplest projects because it was just a matter of spray painting the parts, assembling and then mounting onto the wall. I did however have a hard time with the installation (maybe because I’ve never necessarily hung shelves on a wall before) – but apparently, you need to have the right kind of anchors for the drywall. It looked good to start, but after a couple tugs and rough dropping of books into the shelves, and they came easily off the wall. 😦
They are much more studier if you use the right drywall screws and anchors or if you are lucky, you can get it lined up with a stud in the wall. I saw some other options on Pinterest for actually mounting them onto one end of the Kura Bed…. so I may revise the reading nook situation later on.
Either way… its still a cute and simple way to get books up!


Yesterday we had a Holiday Dessert Potluck at work. When I saw the sign up sheet I saw an endless list of sweets so I thought it would be a nice addition to go the holiday beverage route.
After combing Pinterest at hot apple cider recipes via slow cooker….I opted for something a little more low maintenance since I was short on time. Saw this pin for a hot apple cider bar and I was sold.


I got pretty much everything I needed right at the grocery store. Easy to find yummy store – bought cider around this time of year as well (got my big jug for $5!). I found the Caramel Bits where the cooking chocolates were. I actually liked it better than full caramel candies since the bits were small and melted faster in the hot drink. I also opted not to put out the rosemary after I had bought it… just kept it with three main toppings. I loved the insulated cups I found. Pack of 20 for $3.99.

Fortunately, I had this nifty Rubios serving tray from some other catering purchase. It was perfect to separate the toppings and my cups also fit right in the center.

I found the printable food tents here.
Once I got to work, I dumped the cider in my crockpot and turned it up high. It took a while to get to the right temperature ( even though I had already had it plugged in at home empty so it would have a head start on being hot during the commute).

It was a total hit! Everyone enjoyed it. The presentation of it was simple but cute. The office smelled delightful. And amongst all the cookies and cakes… my hot apple cider bar definitely stood out. This will definitely be a repeat holiday potluck menu item!
