
When it came time to upgrade my daughter to a “big girl” bed, I became obsessed with all the ideas stemming from Pinterest to hack the Ikea Kura Bed. It just seemed perfect! Loft, but not too high. Twin sized and would allow for me to maximize the space underneath. Ahhh… It was the bed I wish I would have had when I was a little girl. I figure, with some inspiration and dedication – I CAN DO THIS! It would save me money, and it would be a wonderful gift to my daughter for her 4th birthday – a gift made with love (and sweat, and a lot of curse words).
First off, I needed the bed. Ikea sells the bed for $200. I found it practically 4 months old on Craigslist for $130 (tax free). Score. Next up, needed to get it painted. My handy dandy man friend was so kind as to primer and spray down the frame to a nice semi-gloss black.


For the panels, I looked at different ways other people were doing it on Pinterest and saw that there were many options: mod podge scrapbook paper, wallpaper, Panyl, fabric, etc. I opted for wallpaper, just because I thought it would be easier to handle (versus paper). I found the perfect sized chevron pattern from Spoonflower. I purchased one roll (24″ x 144″) for $67 shipped and seriously, if I had messed up on measuring and cutting any of the panel pieces, I would have been screwed. It was EXACTLY enough. And I am damn impressed with myself at how well I cut and lined everything up. My first time wallpapering!


As I just mentioned, this was my first time wallpapering. I borrowed the tools and adhesive from my handy-man-friend. What I did notice though, was that even after it dried – it easily could be peeled off. UGH. so I had to keep reapplying adhesive to the corners and stuff because when I brought the panels up to the room, some of the corners would brush against stuff and turn up. I swear it was dedicated wallpaper adhesive… but I guess the panels themselves were too glossed to make it stick? Anyhow, I wasn’t about to go figure that out, so I ran with it because once the panels were slipped back into the frame, then all of the edges were secured and covered, so there wouldn’t be anything aggravating the panels any further. Nuff said.

Time to re-assemble the bed. Got the panels in…. and TA-DA!! My finished Chevron Kura Loft Bed.
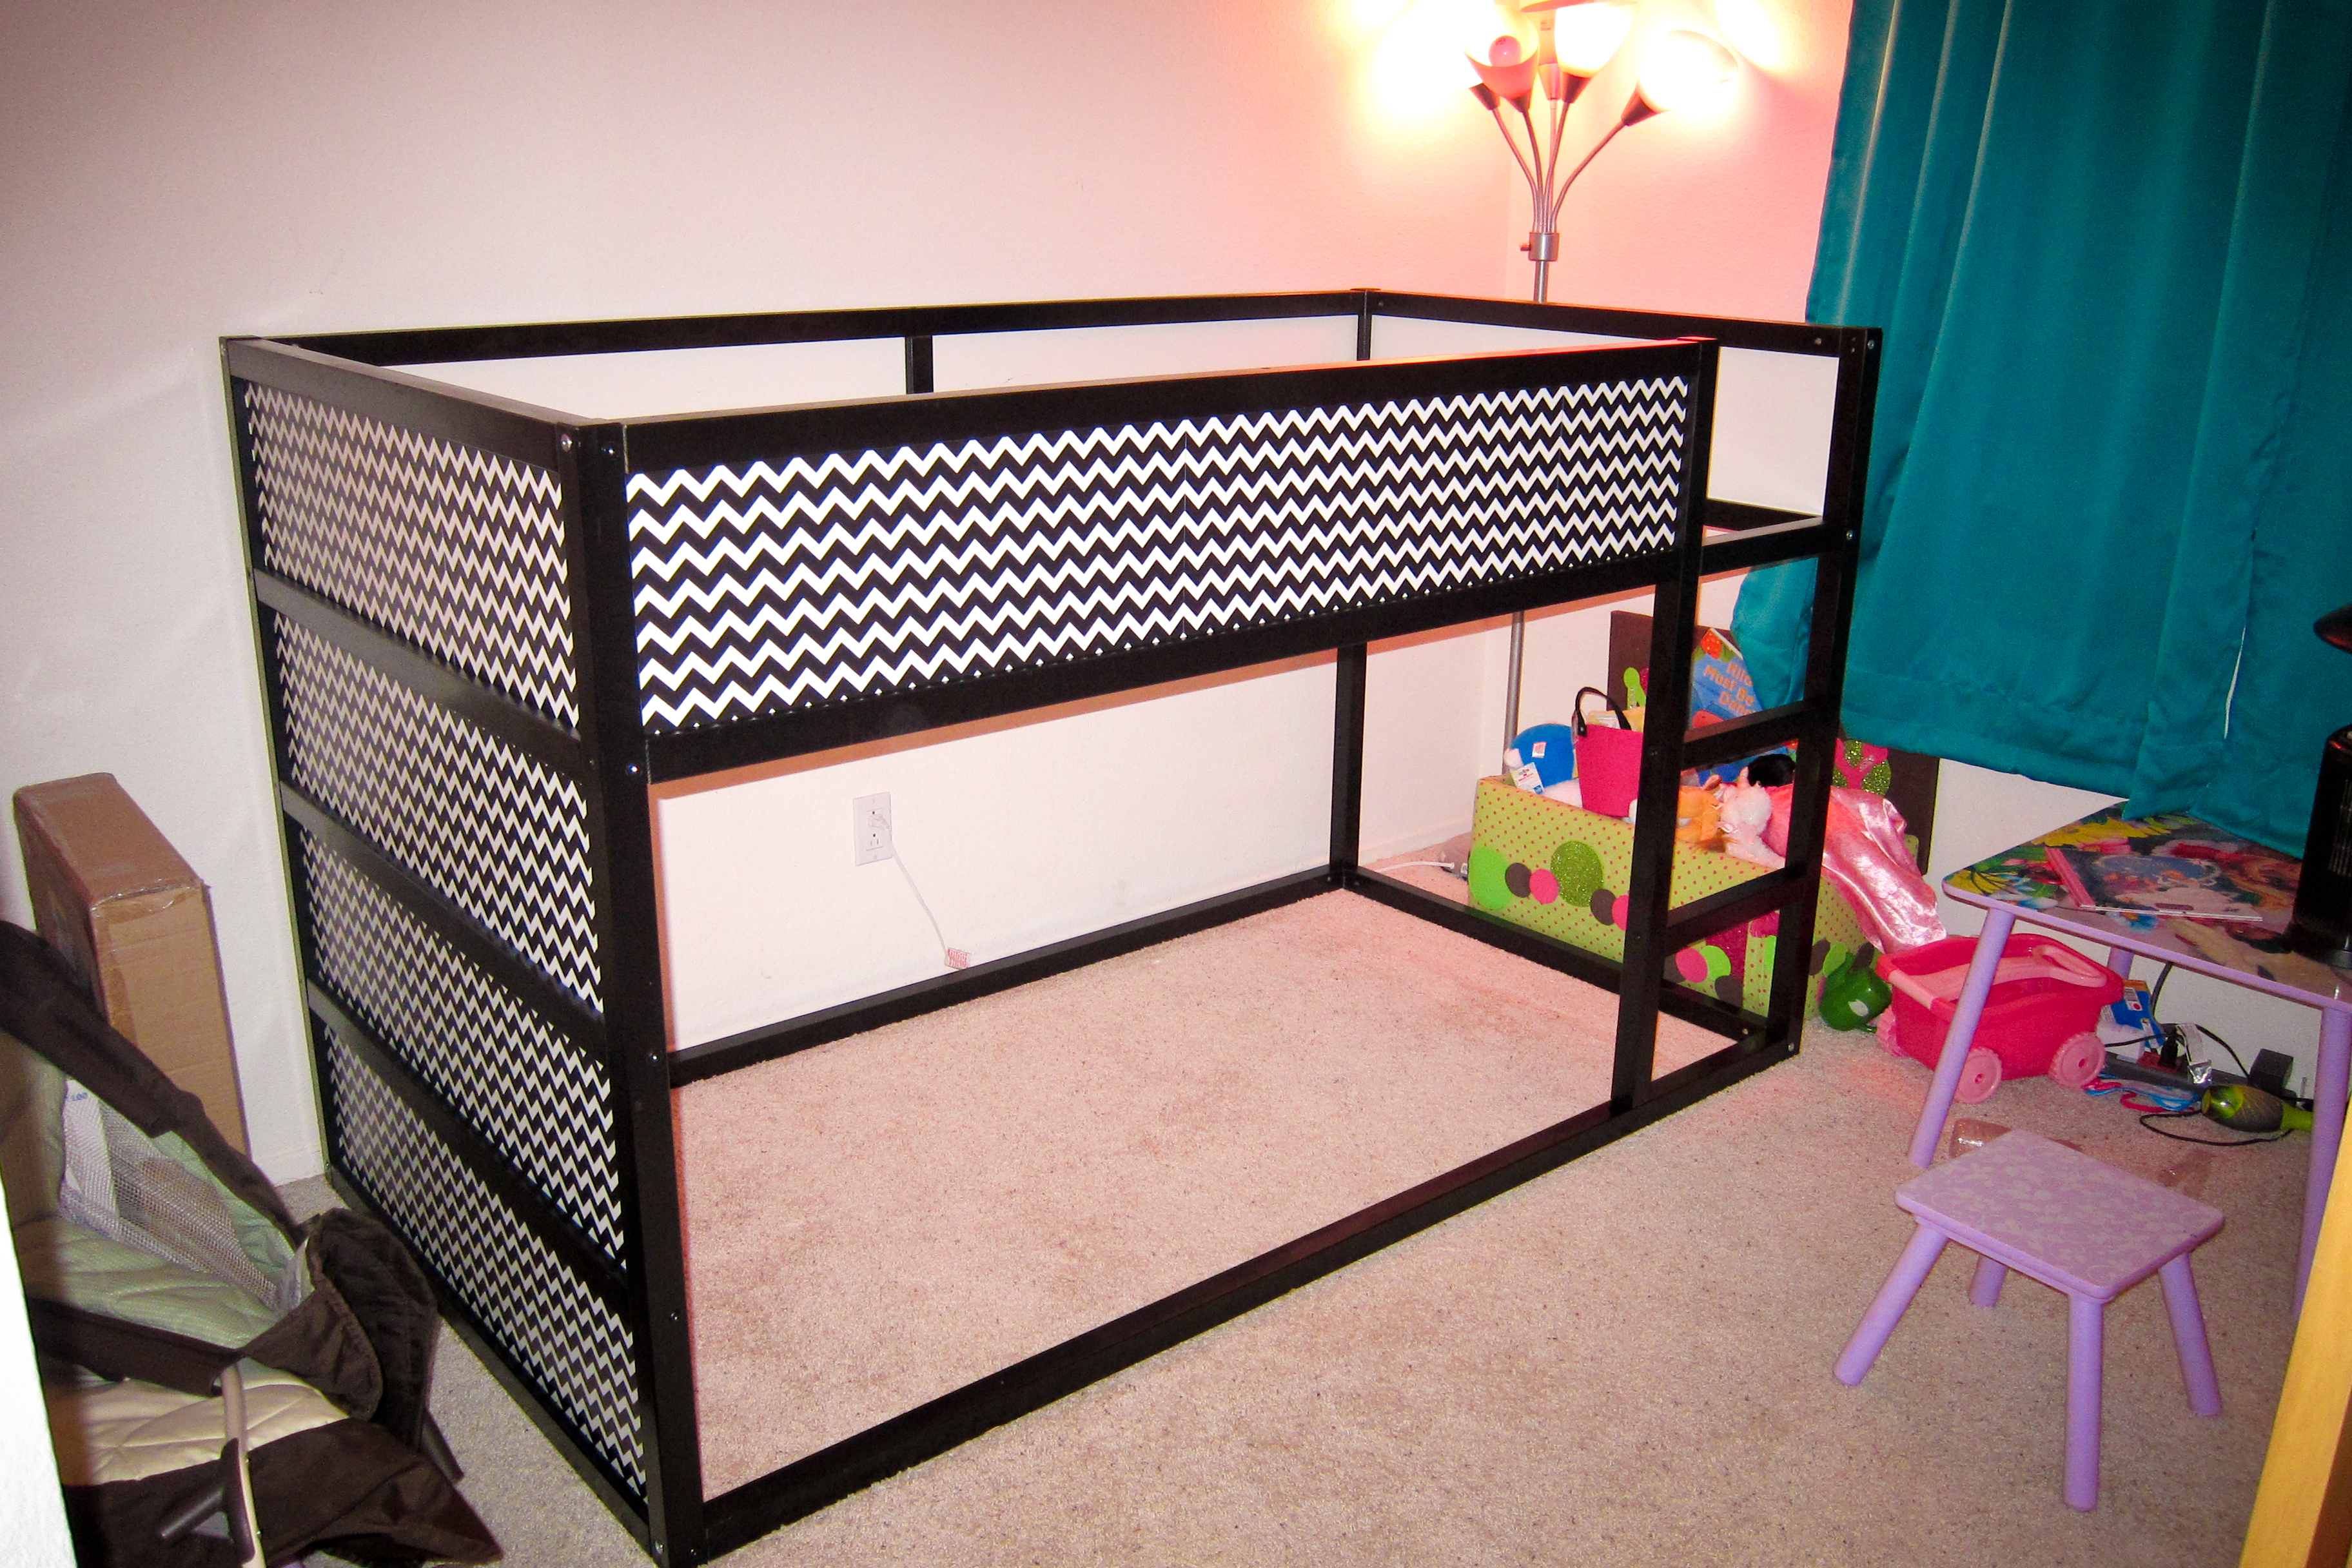
For the mattress, Ikea recommends specific height restrictions for safety reasons. So I combed the internet for a mattress, which of course, were slim pickings due to the height. I read not so great reviews on the Ikea mattresses and ultimately went with the Spa Sensations 5″ Twin Memory Foam Youth Mattress from Walmart for $109. Had decent enough reviews. When it arrived to the house, it was just as I had expected. Simple and actually pretty comfy. I have slept on it with my daughter several times just fine. I also got a waterproof/allergy mattress cover set from Costco just in case she has an “accident”. – You can see my daughter likes Hello Kitty. 🙂

Lastly, I strung some Xmas lights underneath the bed for her “reading nook”. Used another idea from Pinterest for the book racks (will post that DIY on another day).

Looks like I have one satisfied customer! YAY! I’m actually still working on her wall art display, but it’s taking me longer than expected to find all the right pieces to come together. I’ll post more pictures of the complete room makeover later on. For now, just wanted to focus on the biggest part of the project – which was the bed hack.


Really well done! Love the color combinations, the black and white along with the bright colors, very modern!
Thanks so much! It was my first time ever doing anything like this and it turned out to be a quite fun experience! 🙂 I still need to post more on the bookshelves I added below and the baby’s crib side – I found a cribset to match the theme perfectly! Thanks for visiting my blog!
I love it!!!!! Such a gorgeous room and chevrons are my favorite right now!! Good work on the Ikea hack!!! Can’t wait for the bookshelves post!!!! – Jess
Thanks Jess! I know…I’m obsessed with chevron right now. Just posted the bookshelves a couple days ago 🙂
Love love love your hack!!! 🙂 May I ask about the ladder? Seems so be on the opposite side as the store picture. Was that part of your hack also? Or does the bed allow for left or right placement?
Hi Lilia! Thanks! Assembly of the ladder on the right side was not part of the hack. It allowed me to do it on that side with no issue. 🙂
Did your friend use spray primer and spray paint for the frame? Or did he paint it with brush/roller?
Hi Paola! He spray painted it, I swear with one that had primer in it…. but sadly, it scratched off really easily if something happened to ding against it. I’m actually getting ready to move it in the next couple weeks and it will give me an excuse to take it apart and repaint it. I’ll have to update this post later once I decide what we will touch it up with this time and see how it holds up.
HI Paola! So I repainted the bed last month. I did not use a primer but I did attempt to do a clear coat… which I didn’t particularly like how it looked on it. I liked the matte black that I had on the touchup by itself. I DID notice that it still scratched pretty easily… so I would definitely venture with using a primer first next time. Or even trying to sand it one round first, because the wood pieces themselves seem to have some sort of coating.
I recently bought a second Kura for my son… Havent hacked it yet… still trying to decide what I want to do with it to make it look not-so-Ikea. Will post when I do!
Good luck!